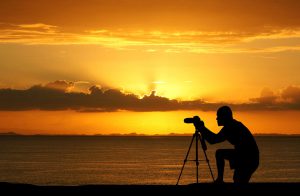
5 Photography Lighting Tips for Shooting Outdoors

photography lighting tips for shooting outdoorsUnderstanding how to take good pictures outside is not the same as shooting indoors. It’s much easier to control the environment when you’re inside your studio or within some other confined space.

Outdoors is a whole other world when it comes to lighting for photography. There are many factors to think about and different tricks you need to use to get the right shot. To get better at taking photos in such conditions, use the following lighting tips for shooting outdoors.

  1. Pay Attention to the Time of Day

The number one rule of outdoor photography lighting techniques is to pay attention to where the sun is during the day.

Framing the sun behind your subject in the middle of the day, for example, casts a shadow over what you’re trying to capture. It’s usually best to face the sun if you want good lighting.

The only exception to the time of day rule, however, is during sunrise and sunset. At these times of day, it can be beneficial to play with the sun as a backlight and taking advantage of the low light around you.

  1. Level the Horizon

Regardless of where the sun is positioned, you have to make sure the horizon is level. There’s nothing like getting “the perfect shot” only to realize it was taken at a tilt.

That takes away from your audiences overall experience and can be distracting. It keeps the photo from being as powerful as it can be and it shows a bit of carelessness on your end, too.

  1. Try Long Exposure

If you really want to “wow” your clients (or generate more projects), play with long exposure. This is a trick that many photographers keep in their back pocket.

Long exposure creates movement. It adds texture to the way the light touches the earth around you and how this gets portrayed in a photo. With this feature, you can catch the flow of the wind or the rocking of the waves. You can make others see how a waterfall crashes or how flowers sway.

  1. Know Your Preferred Filters and Settings

Another useful tip is to have a go-to set of filters and settings.

An outdoor photo may seem like a throwaway until you get back to the editing room and fix it up a bit. However, you’ll waste a significant amount of time if you start the editing process from scratch every single time.

Not to mention, you should be taking the photos in a standard arrangement of settings, to begin with. This creates consistency in your work and helps you establish your personal brand as a photographer.

  1. Find the Right Lens

Last but not least, make sure your camera lens is made to perform outdoors. The same technology you use for wedding parties and portrait work may not cut it when you take things outside.

In some cases, a lens is diverse enough to do it all. Nevertheless, make sure you have what you need before you try different lighting settings outside.

Apply These Photography Lighting Tips for Shooting Outdoors

Whether you’re going on a hike through the mountains or you want to get a few shots of the sunset on the beach, there’s a certain way of taking photos outside that’s distinct from other kinds of photography.

Use these lighting tips for shooting outdoors to help you get the hang of things. Then, experiment with new tools and various angles to create something spectacular.

For more photo-taking tips and tricks, click here.

MorePhotos offers online solutions that include professional websites and a powerful e-commerce shopping cart. With our friendly and knowledgeable staff, we can assist you in creating an online presence that will attract traffic to your photography website.

What Clients Look for in a Photographer’s Online Portfolio

tips for a photographer's online portfolioIf you’re a freelance photographer or run a small photography business, a strong marketing strategy is going to be essential for attracting more clients. The two most important aspects of that marketing strategy will be a great website and a strong online portfolio.

Clients will hire you based on the quality of the work you’ve done in the past, therefore, you need to compile the best photography portfolio possible. You want to be able to back up what you’re telling clients you can do for them with visual proof.

When it comes to hiring a photographer, potential clients do actually need to see to believe. Below, we’ve put together a few tips for compiling a photographer’s online portfolio that you’ll be proud to show to potential clients. Read on to learn more.

  1. Show a Range of Work

If you’re creating one standard online portfolio to use at meetings and show to prospective clients, you should include as broad a range of work as possible. Clients don’t always know exactly what they want. More often, they’re looking to you to be inspired.

Keep in mind that range can mean a lot of things. Try to show off different events, locations, and times of day you photographed. Plan to also include a mix of black and white and color photography.

  1. Be Organized

When you’re choosing photos to include in your portfolio, try to put yourself in the mind of a potential client. Everyone values their time and they want to be able to get answers to their questions as quickly and efficiently as possible.

Select a method of organizing your online portfolio that will make sense to a client, even if it isn’t what makes the most sense to you. For example, you might want to organize your portfolio by the style of photography or by which camera you shot on.

Those technical distinctions are likely to be lost on a client. Organizing your portfolio by different types of events–weddings, corporate events, etc.–will make more sense for others and will go a long way in building a strong client relationship.

Displaying organization in your work is a great way to make a lasting impression with potential clients, in particular when they may be hiring you for a busy event. Remember, you’re creating a visual journey. The easier the layout and navigation for your online portfolio, the better.

  1. Stay Up-to-Date

If a potential client is going to hire you based on the strength of your online portfolio, they need to trust that what they’re seeing is what they’ll get. No customer is going to hire you based on work that you did years ago because there’s no guarantee that your work has maintained that style or quality.

That being said, you don’t have to update your online portfolio every day or eliminate older photos. Showing clients how your work has evolved over time can be a powerful tool. Just make sure that the bulk of your photos are recent enough that your clients will feel confident in what you’re promising them.

Consider juxtaposing some photos to show different techniques you’ve used over the years as well.

Ready to Start Putting Together a Photographer’s Online Portfolio?

The strength of a photographer’s online portfolio can be the difference between business success and failure. It’s the best representation of your talent and professionalism. Take the time to carefully consider each photo you select. You should feel confident that your portfolio is the best representation of your work.

For more information about growing your photography business, please contact us at any time.

MorePhotos offers online solutions that include professional websites and a powerful e-commerce shopping cart. With our friendly and knowledgeable staff, we can assist you in creating an online presence that will attract traffic to your photography website.

5 Tips For Creating Pet Photographs Your Clients Will Love

create the perfect pet photographsAre you an aspiring pet photographer?  It’s a great business if you have the right skills.

Photographing pets can be difficult. You want to snap pets in their natural element and savor their cuteness. It’s challenging since animals often can get distracted, looking away and walking off while you’re trying to snap the picture.

There are strategies professional animal photographers use that can work for any pet. Here are seven tips for creating the perfect pet photographs.

  1. Get the Timing and Lighting Right

The minute you see your subject in a cute position or looking straight at you, start photographing. Timing is everything when it comes to great pet pictures. For the best pet pictures, keep the camera eye-level.

In addition to getting the timing right, Lighting is vital for great photographs. To catch cute pictures of your furry friends, make sure all appropriate lighting and equipment are set up prior to the shoot. Be careful with the flash as not to startle the pet or avoid using it all together. Use natural lighting when possible.

It’s a good idea to spend some time educating yourself on different lighting techniques, apertures, and the equipment necessary. Use a wide aperture setting, such as f/2.8 to create soft backgrounds.

  1. Make Sure They’re in Their Environment

If you take a pet to a studio, they’ll likely be uncomfortable because they’re not in their environment.

If you’re an aspiring pet photographer, go to the pet owner’s house. They’ll be in their environment and more comfortable, which means you’ll have a greater opportunity to capture that perfect shot.

Bring your all your equipment, props, and backdrops with you to the pet’s home. A curious pet will love checking it out and you can use this opportunity to make them comfortable, allowing them to smell you and the items. Familiarize the pet with your camera and its sounds. That way, they won’t feel confused or threatened.

Work with the pet’s personality; for instance, are they most playful at a certain time of day or do they prefer a particular spot in your home? Capture them in their comfort zone and at ease.

  1. Be Aware of Your Surroundings

Once the pet is familiar with you and your equipment, you may wish to photograph the pet outside of their home, such as the park or the beach. Just be sure to be aware of your surroundings.

Another dog or person running up to your pet ruins the picture. Or maybe there’s something in the background you want in your picture.

Do you want that perfect freeze shot of your pet jumping or running? This involves some pro gear. Educate yourself on shutter speed and buy a good lens with a wide aperture, ideally f/4 or below to capture that great action shot and soften the background. Using a sports mode is a good option for automatically freezing the action as well.

  1. Reward Them After a Great Picture

Have an attention-getter, such as a small treat or a squeaky toy.  The pet won’t take their eyes off of you, which helps produce great pictures.

This is another good tip to familiarize the pet with the camera. After a great picture, give them a treat. They may not know what you’re doing, but they’ll see the camera and start obeying!

Furthermore, rewarding them with a treat is a good chance to stop and regroup if you need to try a different method for your photo shoot.

  1. Patience is a Virtue

Animal portraits are different than traditional portraits. You need patience when photographing them.

Stay calm and don’t get discouraged if you’re not capturing the shots you want on your first few attempts. Pets can read your feelings and they’ll sense your composure. If you don’t get a good shot now, there’s always next time.

Taking your time and getting to know a pet is essential in building trust and will help in having them respond to you when you attempt to photograph them.

Time to Take Pet Photographs

Pets can be hard to photograph. However, with the right tips, you can take great pet photographs. Always remember, pets aren’t humans. Make sure they’re comfortable and you reward them for great pictures.

For more tips on running a successful photography business, visit our resources.

MorePhotos offers online solutions that include professional websites and a powerful e-commerce shopping cart. With our friendly and knowledgeable staff, we can assist you in creating an online presence that will attract traffic to your photography website.